Sunday, September 29, 2013

Current Project Sneak Peek: Making a Sports Coat

I just wanted you all to see what's on my cutting table. I'm currently working on 5 pieces for a client. That's a Sports Coat, a Suit, and 2 pairs of pants. Here's a pic of the Calvary Twill fabric I'm using for the Sport Coat. It's an amazing fabric and is the perfect weight! The color is a rich brown. You can see where I traced the Sports Coat pattern pieces in chalk and just have to cut them out. Of course tailoring is my SPECIALTY so  it's nothing for me to get a coat completely tailored and sewed up in several hours. I plan to show you some of the steps I use to help bring this coat to life. Be sure to stay tuned in. There's more to come......

 (Chalked pattern pieces up close. Notice how I place all of my pieces really close together to conserve fabric. That's always something to be mindful of!)

(I traced the pattern pieces onto the wrong side of the calvary twill. I flipped up fabric so you could see the right side and the signature twill weave.)

Tuesday, September 24, 2013

Video: Tailored Jacket Construction Details

Hello All! As promised here's a video that gives a little more details about the jackets I made for my daughter in this POST. Both jackets are completely tailored and I just wanted you to get a better idea of the type of work that goes into my jackets. Remember it's always the best product and techniques that always yield a better looking garment! Hope you enjoy the video:)

Sunday, September 22, 2013

Tailor's Tip: Making a Quick Partial Pants Lining

You know lining pants is super easy and definitely extends the wear of your pants in critical areas. I line nearly all of my pants.  Here's a quick tip on how to make a partial pant lining (from waist to mid thigh). You don't even have to fiddle with the original pants pattern. Just work directly with your cut out pants fabric pieces!


1.  Just place your cut out pants (front and back) on top of your double layer lining fabric.
2.  Fold the pants leg up to where you want the lining to stop.
3.  Measure from waist to fold end on and from the crotch to fold end for both the front and back pattern pieces. Make sure they're both even so you know you're cutting the linings for both the front and back pattern pieces the same length.
4.  Trace the pattern onto the lining fabric or just cut it out.
5.  You can now add the lining to the pants fabric. You can serge it on to treat it as one fabric and continue with you pants construction.

You see making a partial pants lining is super easy!!!!

Thursday, September 19, 2013

Student Work

Teaching is one of my greatest passions!!! I love breaking down big sewing concepts and seeing that glimmer in the eye's of my students when they finally get it! I wanted to showcase the work of one of my students Rae, who started sewing in July. Fast forward 3 months and she amazingly churned out a wonderful seersucker suit--both jacket and skirt. Only in 3 months!!!! Please don't mind the wrinkles on the suit, it's on a display form in my shop. Trust me, this suit fits her like a glove. I believe that with the RIGHT TECHNIQUES anyone can learn how to do the same thing. I teach in a way that helps my student get the maximum results in a minimal amount of time. I look forward to sharing this type of information in all future YouTube videos and DVD's I produce. I'm so proud of my students!!!!


Monday, September 16, 2013

Alteration DVD Set WINNERS!!!!


It's time to announce 10  the winner's of my Alteration 2 Disc DVD Set!!!! The day has finally come and I'm ALL TOO EXCITED to be hosting this giveaway. Ok, with the help of Random.Org, here are the winners.....

1. Nothy Lane
2. DawnSSL
3. Gjeometry
4. Mamafiore
5. Monic
6. Sillykid
7. Beckypb
8. Emily
9. Faye Lewis
10. Shaqeatta Jackson

CONGRATS Ladies!!! To claim your DVD please email me your full name and address at GentlemanJimMT@gmail.com.

Also, allow me to announce that my next DVD will be on PANTS!!!! Be on the lookout for that in November! More info to come!

Saturday, September 14, 2013

Work Sneak Peek and Upcoming Video....

Hello All!!! I just finished up 2 jackets and a pair of dressy houndstooth print knit shorts for my daughter and thought I'd share them with you. You might recall from this post that I completed a pair of pants for her not too long ago. Since she's in business school up at FAMU I help her maintain a professional wardrobe. Anyhow, here are the pictures. I will be doing a VIDEO in a few days showing the details of all 3 pieces. So be sure to check that out.

BTW, don't forget my 10 Alteration DVD Giveaway ends September 16th. To find out contest rules see this post.

Hope you're having a delightful Saturday evening! Talk with you soon.......

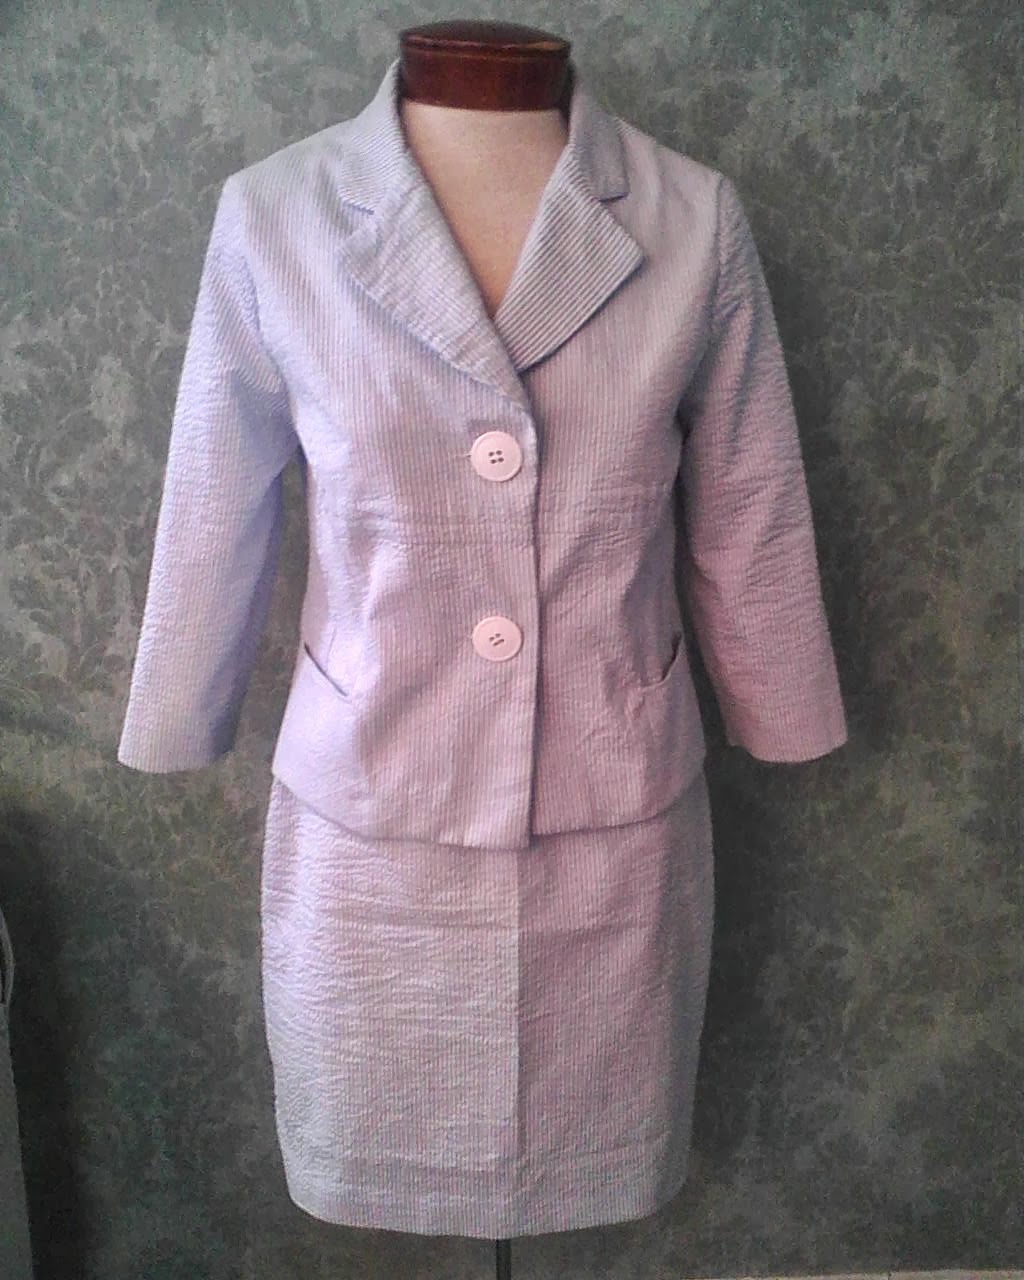
(Shawl Collar Jacket and houndstooth print knit shorts with wide cuff)


(Shawl collar jacket and shorts on hanger)

(Yellow jacket. Note: Due to photo rotation jacket looks a bit longer then actual size)

Tuesday, September 10, 2013

Video: Sewing a Welt Pocket on a Vest

Hello All! I was busy in my studio working on a client's vest and thought I'd give you a sneak peek into how I put a welt pocket into a vest. The video was an impromptu decision so please forgive the smart phone quality. I'm actually planning a future video that will show my pocket installation techniques in great detail. Here's the video and I've also included a few stills so you can see the details better. I know this fabric has a busy design and it may be a little hard to see details on it. As a side note, vests are a popular item for me to sew. One of my clients has a collection of about 60 vests, majority of which I've sewn. I can usually sew one together in one hour. Hope you enjoy the video and again excuse the fuzzy quality at times.


 (Marking on the vest and welt (see white chalk lines) where they need to be sewn)

 (Reverse view of vest after sewing down welt and clipping open the opening)

 (View of the pocket lining and facing after being sewn)

(Bagged pocket view up close)

Also, don't forget about my 10 Alteration DVD 2 disc set HERE! Make sure you join the giveaway. I'd love for you to win one of my wonderful DVD sets!!!

Sunday, September 8, 2013

Remember these Pants.....

You may recall  I created a YouTube video on "Video Tutorial: How to Add Waistband, Ban Roll and Clamp Hook and Eyes to Trousers Part 1 and Part 2 on last month.Well I wanted you to know what became of those pants. It turns out I was making them for my daughter who's a business major at FAMU. I've been making clothes for her all of her life. She's one of my favorite "clients" (wink). Since she's a business major she has to wear business attire ALOT! I've made more jackets and pants for her then I can count. I'm currently working on a white jacket for her and a just finished up a pair of hounds tooth dressy shorts to go with it. I'll post pictures of both of them once I finish the jacket. Well here's a pic of her just trying them on the pants in the video for the first time. Forgive the crude pictures captured by my cell phone. Below are the front, side and hanger view of the pants.


Allow me to point on something about these pants. This is a side view of her pants on a hanger. Notice how the top of the backside of the pants angles up. This is to account for the fuller rear she has. You add height to the center back of the pants to ensure the pants cover her fully and that upon sitting the pants won't dip down.

Anyway just wanted to show you the finished product. It's always great to have a satisfied customer, especially so when she's your daughter (smile).


Tuesday, September 3, 2013

Dress Alterations: Before and After

I recently had a client come to my studio who wanted to make some adjustments to a dress she'd bought from a boutique. She wanted her dress with a V-shaped neckline converted into a strapless dress. She'd been around to all of the the local alteration shops and everyone had turned her down for one excuse or another. They said they couldn't do it, it wasn't possible, too difficult--you name it. Well as a tailor I like to take on unusual requests. I studied it for a few minutes and then I came up with a solution. You'll see the before and after pics below. I simply removed the straps and add a panel that joined the front bodice pieces together. I did the same for the back but instead used a bow. The alteration turned out great and my client LOVED the dress! She couldn't stop raving about it! Don't be intimated when you run up against a sewing challenge. You'd be surprised what you can pull off with a little thought and ingenuity:)

BEFORE---this is the dress featured on a model on the Allure Bridal website here. I forgot to take before pics of my client in the dress.


After: Front and Back photos. This is my client wearing her altered gown. The strapless conversion was just what she wanted!!!!